On Friday I decided that my sewing room needed a good sort out and some DIY had to be done, urgghhh for me this is a first but after I had drilled, sawed and made a complete mess my desk area which now runs along two sides of my sewing room is very spacious and has lots of room underneath for my shelves of fabric and I am very proud of my self because not only does it look fab its safe it has stayed up ha-ha and I’ve got everything in its place and I can find everything so I’m super happy 🙂
So when I tidy everything away I found all of my sewing magazines and I came across this one Prima Special Makes issue 4, which I didn’t buy that long ago and the” Hello Dolly” article caught my attention after reading through I decided to make her for my little girl.

You Will Need:
30cm x 30cm calico or linen for the doll body
Soft toy filling
Felt for the hair
Embroidery thread
45cm x 25cm for the skirt and blouse
40cm Ribbon
Ric Rac
Two pieces of felt 23cm x 12 cm for the jacket
Felt scraps for shoes and buttons
now I decided no to make the skirt, blouse and jacket as in the article I thought a nice little miniature size pillowcase dress would be much nicer and easier for my 3 year old to manager taking of and putting on
For the pillowcase dress you will need
Two 27cm x 27cm pieces of fabric
40cm ribbon #
To Make The Rag Doll


1. Pin the doll template to the calico and cut out two body pieces and 4 leg pieces, place fabric right sides together and sew around the body leaving the bottom of the body open, repeat for the legs, Snip corners as shown on the templates

2. Turn right way out, use a blunt pencil to help push out the arms, for the legs I push in the end a little bit and then use the pencil to push it right way out.


 3. Fill the body and legs with the stuffing, putting in small clumps at a time. push it into the ends but do not over stuff, TIP: I like to kinda massage the body and legs to get the filling in the right place and look good.
5. Fold in the end of the doll body and place the legs tops inside, sew across the body bottom securing the legs inside.
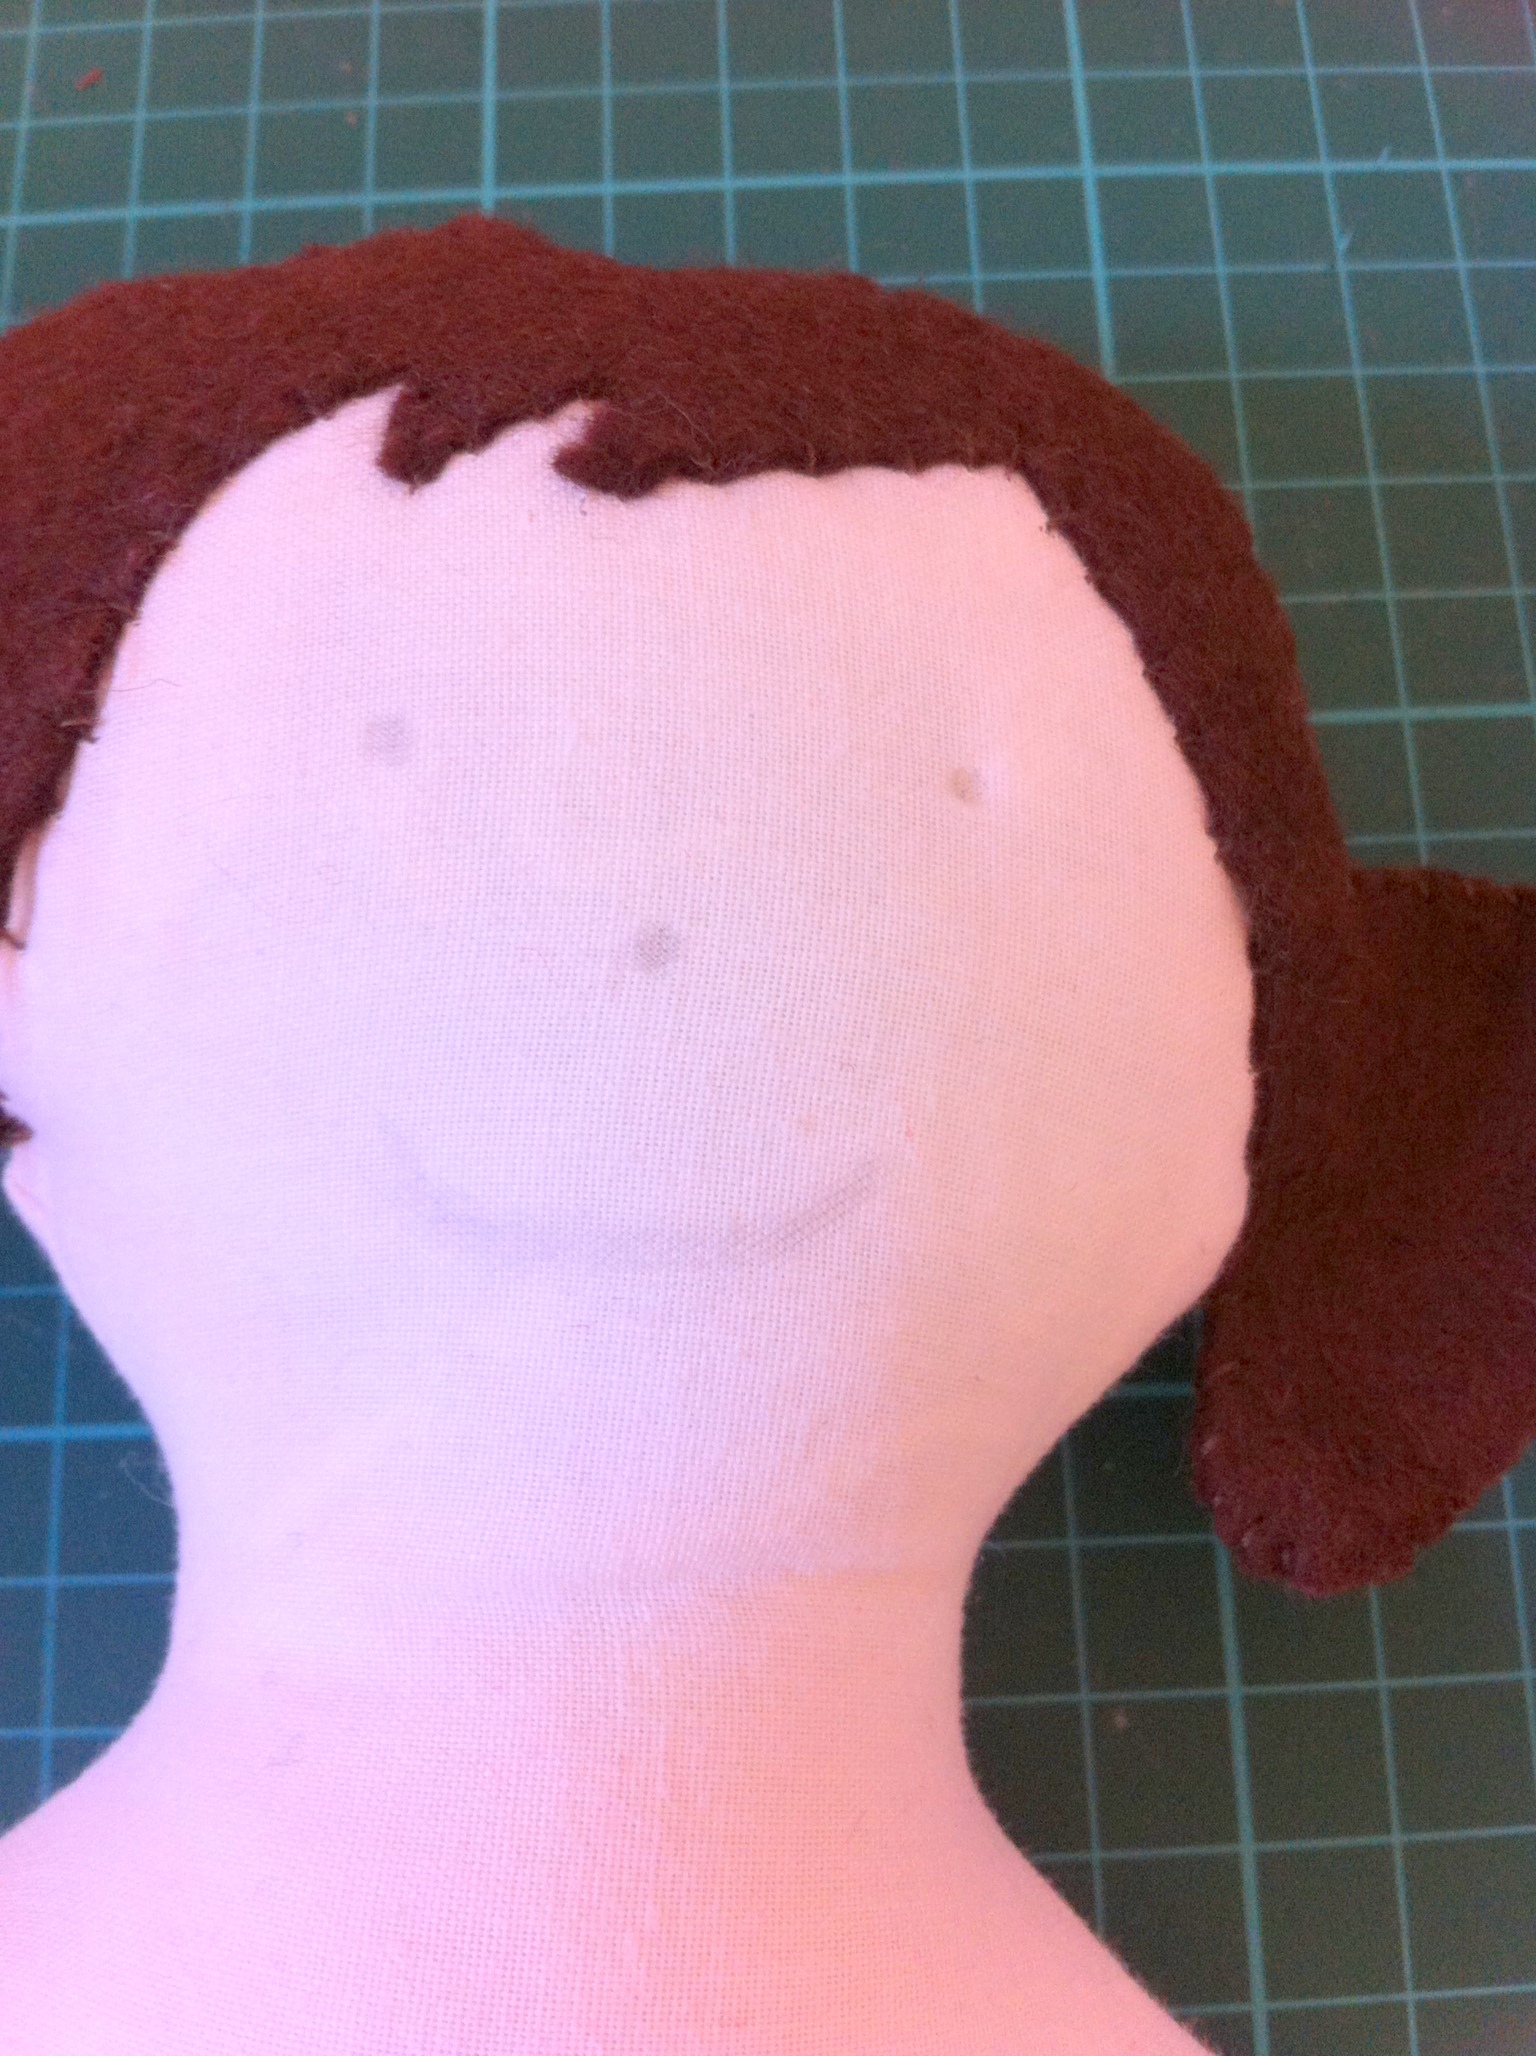
To Make The Hair and Face.
1. Using the template cut the hair front and back from the felt, pin them together wrong sides facing, over stitch the edges around the crown and bunches.

2. Fit the hair onto the head so it fit snugly and in the right position, sew the hair onto the head sll the way around.
3. Lightly pencil in the eyes, nose and mouth, for the eyes using the embroidery thread sew a few small stitches to make the eye, use the same technique for the nose, for the mouth use a backward running stitch.

To Make the Miniature Pillowcase Dress
1. Cut two 27cm x 27cm squares of fabric, place right sides together and pin, measure 12cm down from the top corners and make a 1.5cm snip on each side.


2. Iron in a 0.5cm hem and the another 1cm hem on the two 12cm top sides this will become the arm holes pin into place, along the top edge fold a 0.5cm hen and then a 2cm hem this will become the casing for the ribbon.
3. Along the bottom edge fold a 0.5cm hem plus 1cm to form the hem line for the dress. Repeat step 2 and 3 for the second piece of fabric.
4. Sew up from the bottom of the arm hole to the edge of the top ribbon casing hem, sew along the ribbon casing edge and down to the bottom of the arm hole on the other side, sew along bottom hem and repeat for the second piece of fabric.
5. Place dress fabric right sides together and sew from the bottom of the armhole to the bottom hem line, repeat on both sides, trim edges with pinking shears or use a zig zag stitch, turn right way out press with the iron.
6. Using a safety pin thread the ribbon through the top neck ribbon casing, I decided to use two lengths of ribbon so it could be tied on both side of the neck you can do one or two which ever one you prefer. 
7. Place the dress on to your doll and tie the ribbons, isn’t she looking pretty.
To make the Shoes
1. Cut out the shoes from felt, TIP: for the front shoe lightly pencil the opening onto the shoe, fold in half and cut out the opening much easier and quicker.


2. Overstitch around half of the shoe then place on to the foot of the doll and carry on overstitching to the top the go all the way around the leg and in the shoe opening, repeat for the other shoe. 1
1
 2
2
 3
3
 4
4
And that it she’s done ready for hugs and playing X


She’s so sweet! I love her shoes! And the pillowcase dress is a great idea 🙂
Thank you beth, Kira is currently playing with both of the dolls x
Reblogged this on handmadeblossomtree.